How To Deep Clean And Disinfect Your RV

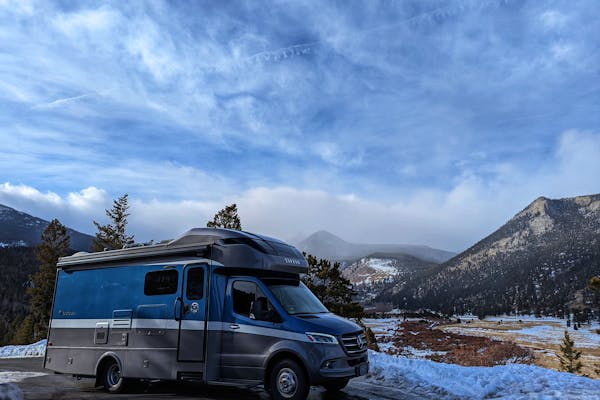
Dustin and Sarah Bauer's Tiffin Wayfarer parked at a campsite under blue skies by a lake

As avid travelers, we know how important it is to keep your RV clean. But we also know that a little dirt shouldn't prevent you from taking your RV somewhere sandy, snowy or muddy. Most of our favorite campsites and outdoor activities are located far beyond where the pavement ends. We’re not afraid to get our RV dirty, but we also know that a clean RV looks better, operates more efficiently and is more comfortable to travel in. In this article, we’ll share our tips for deep cleaning and disinfecting your RV so you can keep doing all of the outdoor activities that you love.

Cleaning Your RV: Where To Start?

When it comes to deep cleaning and sanitizing your RV, start with a plan. Make a list of all the areas in your RV that need cleaning and then prioritize them. We like to start with the dirtiest areas, which are usually the exterior and outdoor storage compartments. We’ll then move inside and start from the top (ceiling) and clean all the way down (floor). It helps to remove all trash and clutter from your spaces before you start cleaning them. This way, you aren’t moving as you clean and it’s a lot easier to spot any scratches or damage.

RV Cleaning Products: What To Use And What To Avoid

When it comes to cleaning your RV, it's important to use the right products. Avoid using harsh chemicals and abrasive cleaners that can damage the finish on your RV. This is especially true for any stainless steel finishes and shower surrounds—both can be etched easily. Try to use mild detergents or any cleaners that are specifically designed for RVs. Be sure to follow the instructions on the label carefully and look for products that are eco-friendly.

Here is a list of recommended cleaning products and supplies:

  • Soft rags or towels
  • Stainless steel bowl for mixing
  • Mild detergent
  • Non-toxic sanitizer
  • Vinegar
  • Glass cleaner
  • Screwdriver
  • Reusable gloves
  • Baking soda
  • Battery-powered leaf blower
  • Broom and dustpan
  • Small vacuum

Washing And Inspecting The Exterior

We typically start by cleaning the exterior of the RV first. Before you begin, make sure you are in a proper place to clean and that you have the right products to gently but effectively get rid of any dirt. Try to wash your RV at a carwash or designated cleaning location, as these places usually have drains so the cleaning solutions and soapy water won’t seep into the ground. Start by giving your RV a thorough rinse with water. Then use a microfiber towel or soft sponge to start scrubbing. Avoid using any abrasive materials or harsh chemicals that might ruin your RV’s paint and decals. 

While you’re scrubbing, be sure to inspect the seals around your windows and doors. These areas can be prone to leaks, and regular inspections can prevent costly water damage. If you notice any cracks or gaps, seal them with a silicone-based sealant. Make sure you also check your roof for any signs of damage or wear. Your RV’s roof is your first line of defense against the elements, and a small leak can quickly turn into a big problem. Check for any cracks, punctures or loose seams, and repair them promptly.

Dustin and Sarah Bauer's RV covered in soapy water

Removing Small Scratches From Your RV

After washing and inspecting the exterior of your RV, you can then address any scratches you might’ve found. No matter how careful you might be, minor nicks and scratches happen—either from tree branches, rocks that fly up, or repeatedly loading and unloading gear. It’s important to get these fixed, as scratches left unattended can start to rust. Many minor scratches can be buffed out by hand with a simple scratch removal product. We also apply a ceramic wax to the exterior of our RV a few times a year to help keep it cleaner for longer.

Cleaning Outdoor Storage Compartments

While you’re cleaning your RV’s exterior, don’t forget to clean and inspect your outdoor storage compartments. These spaces often harbor small critters, and a quick visual inspection can be an easy way to spot any leaks or damages under your rig. Plus, doing a regular clean-out is a great way to do an inventory check to see what you’re storing in there and what you could possibly get rid of. 

Our favorite way to clean the outdoor storage compartments is by using a battery-powered leaf blower. It’s much easier and more convenient than hauling a vacuum in and out. Just make sure you blow the dirt outside of the compartment so you’re not pushing it further and deeper inside. After all of the dirt is gone, wipe down the inside with a mild detergent or vinegar solution and let them air dry before you close them again.

Cleaning Vents And Windows

Cleaning the vents and windows in your RV can be tricky and is often overlooked, but it's essential for maintaining good air quality and visibility. To clean the vents, remove the covers (you may need a screwdriver to do so) and use the brush attachment on your vacuum to remove any dust or dirt. You can also use a damp rag to wipe down the vent covers. We address our lights the same way—vacuum first and then a damp rag on the rest. To clean the windows, start by using a dry cloth to remove any loose dirt and dust. Then use a window cleaner and a soft cloth to clean. Be sure to use a cleaner that's safe for the type of windows in your RV. 

Cleaning Walls And Interior Cabinets

To clean the walls, use a damp cloth and a mild detergent. Start at the ceiling and work your way down. We find it's best to dust with a damp rag and buff with a dry one. Be sure to rinse the rag often to avoid streaks. For the cabinets and drawers, use a vacuum cleaner with an upholstery attachment to remove any dust or dirt buildup. Then use a damp cloth and mild detergent to wipe down the surfaces. If a damp rag isn’t enough, we’ll use a vinegar and water solution to help cut the grease and grim. If there is a particularly dirty or messy area, we like to sanitize it with isopropyl alcohol after it’s been cleaned. 

*Never mix vinegar or ammonia-based cleaning products with bleach. This creates chlorine gas, which is a very dangerous chemical that is deadly in high volumes.

Defrosting And Sanitizing Your Refrigerator

Keeping your fridge and freezer clean is an important part of RV maintenance. To defrost and sanitize both, start by turning off the unit and leaving the doors open for a few hours. We use a blow dryer and a towel to melt any built-up ice. Once everything is defrosted, use a warm, wet cloth and baking soda to wipe down the interior surfaces. Use a mild detergent and vinegar to sanitize, and then rinse with warm water. 

If you’re having a hard time getting rid of any smells, try using a mixture of baking soda, vinegar and water. Leave the doors open for a while to help it air out. You can also put an open box of baking soda inside of your fridge to help prevent mildew smells.

Sarah Bauer cleaning out the fridge in her RV

Vacuuming Your RV: How To Get Rid Of Dust And Dirt

We have made it a habit to always sweep or vacuum our RV before we leave any campsite. In addition to keeping your RV clean, this also helps ensure that you’re not transporting any seeds or pollen from one place to another. We are fortunate to have a central vacuum system in our Tiffin Wayfarer but we still bring a small, portable vacuum with us. Before and after a trip, we like to vacuum all of the floors. Don’t forget to get behind the couch, under the chairs and around the slides. Your slideouts are super important, as you don’t want any debris ruining your floors or jamming your slides when you go to bring them in.

Cleaning The Kitchen And Bathroom

To clean your RV kitchen and bathroom, start by wiping down all surfaces with a damp cloth. For tougher stains or soap scum, mix baking soda with a little bit of water and apply it to the area. Let it sit for a few minutes before you start scrubbing. Just be careful when doing this, as you don’t want to scrub anything that can be etched, such as ceramic, marble, glass, or stainless steel. If you’re worried about scratching any surfaces, try a mixture of warm water, vinegar and non-toxic mild detergent. After everything is clean, buff them with a soft, dry towel to get rid of streaks.

How To Maintain A Clean RV

Keeping your RV clean doesn't have to be a major chore. With the right maintenance routine, you can easily keep your RV looking great all year round. You can also use non-toxic air fresheners and dehumidifiers to keep your RV smelling fresh and dry. Be sure to clean up messes and spills as they happen. The longer you wait, the harder they become to clean. Sweep and vacuum your RV regularly. Avoid clutter and try to keep your decor to a minimum. This leads to a nice visual space, but it also helps keep your weight down and makes the cleaning process much easier.

Class C Motorhomes

Class C motorhomes offer outdoor experiences for larger families at a lower price point than Class A Motorcoaches. Recognizable by their raised sleeping or storage areas which extend over the cab of the RV, Class C Motorhomes offer more living space than Class B Motorhomes but are smaller in size and can offer better gas mileage than Class A Motorcoaches.

Find Your Perfect RV

Whether you're new to the world of RVing or you're ready to narrow your search, we're here to help you sort through it all and find the RV that's right for you. Explore RVs based off of your lifestyle and the features important to you.

Find Your RV
An travel trailer RV parked in a green field.