The Basics of Travel Trailer Maintenance

What to look out for before every trip, and how to keep your RV running smoothly.
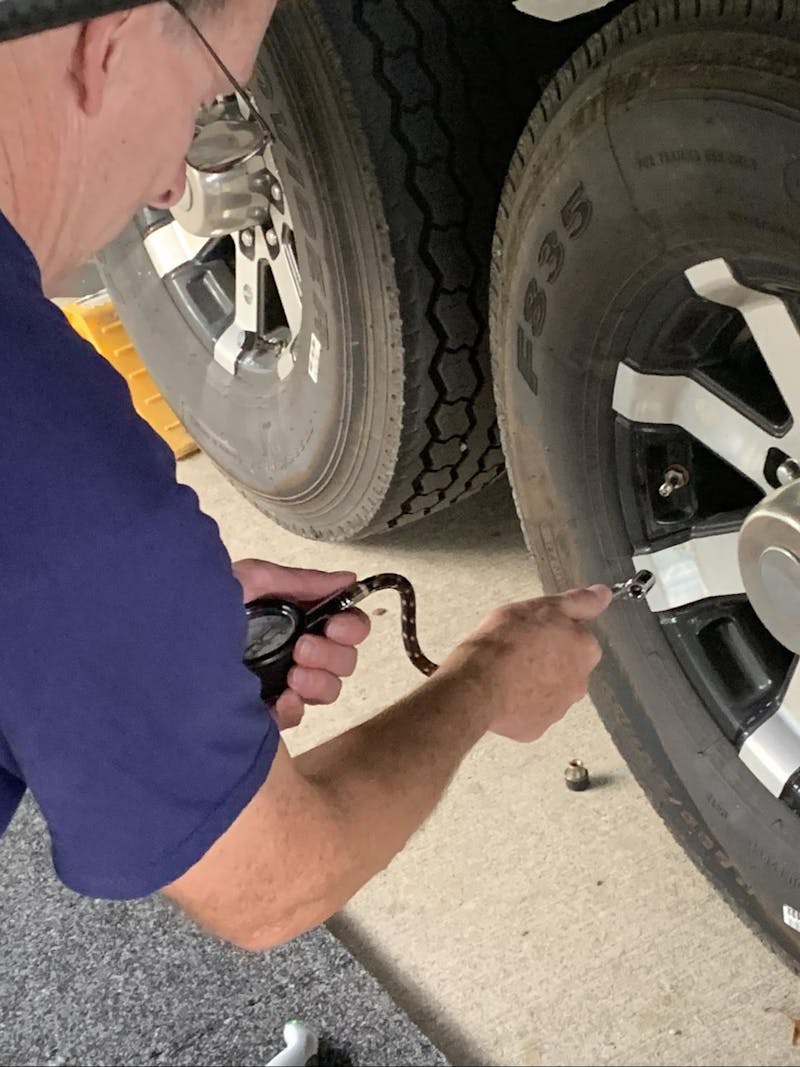
Tom Boswell showing how to check tire pressure on his RV.

Whether you live in an RV full-time, sometimes, or just call yourself a ā€œweekend warrior,ā€ your RV will require maintenance. Some types of maintenance need to be done regularly, and some need to be done before each trip. Other maintenance needs are less frequent, but no less important, because we all know itā€™s much easier and cheaper to keep something running smoothly than to fix it when it goes wrong.

Iā€™ll walk you through some of the main things youā€™ll want to check as an RV owner, but these are by no means the end all, be all of rig maintenance. As you learn more about how to care for your unit, youā€™ll no doubt uncover other little ways to keep things running as they should on the road. And if you ever have questions, there are great dealers and communities of owners who can lend a helping hand, wherever you go. Letā€™s dive in.

Disclaimer: Make sure you know how to safely use all of the tools mentioned below. Every RV is unique and will require different safety checks and maintenance. If you need help, please be sure to consult a professional.

Before Each Trip

Before Each Trip

First off, do a full systems check. When you bought your RV, the seller should have demonstrated how every system is operated or used in your particular model. So for every journey you take, do a full systems check before you hit the road. This will help you become more familiar with your rig and help prevent possible problems, because youā€™ll have a frame of reference for how everything should work when itā€™s working well.Ā 

Make sure your rigs fuel tanks are filled and working.Ā  In the course of your systems check, ensure that your tanks are filled with the appropriate fuel, and that any appliances or elements that run on that fuel are working. For instance, if your kitchen appliances run on gas, top off the propane and make sure the appliances are connected and running correctly. You donā€™t want to be on a cold weather trip and find out your heater doesn't work or you canā€™t cook on the stove.Ā 

Donā€™t forget to check the generator. The next step in your full systems check is to test your generator, if you have one. Make sure it starts up easily and that its capacity can carry the load. Failure to do so could mean you might not have the ability to recharge your RVā€™s batteries or run any systems that require AC power. Your RV batteries run all the 12-volt DC-powered items, like the lights, vent fans, slide and leveling systems. They also provide power to the water heater and refrigerator ignitors when running on propane. If your RV has the standard deep-cycle lead-acid batteries, you should check the electrolyte level in your batteries, too.

Now that you are confident your RVā€™s systems are good to go, there are a few more items you need to check before you hit the road.

Always, always, always check your tires. Ā Check the pressure in all your tires and visually inspect each one for signs of abnormal wear or damage before you leave for a trip. Every time. Tire failures are a common problem faced by RVersā€“ā€“maybe the most common, because more tires equals a greater chance something can go wrong. These failures can be caused by things like the age of your tires, overloading your RV with excess weight, under-inflation, over-inflation and damage from road hazards.

Make sure you check the tire pressure ā€œcold,ā€ meaning before youā€™ve driven them, and when they havenā€™t been sitting outside in the sun for several hours. Your tires should be inflated to the pressures listed on the tire sidewall, unless specifically instructed differently in your RVā€™s ownerā€™s manual. Due to the size and weight of RVs, the damage can potentially be severeā€“ā€“so look for every opportunity to check your tires and avoid any preventable accidents.

Check your lug nuts. Next, while youā€™re giving attention to the tires anyway, check the lug nuts on your camperā€™s wheels. You want to ensure none of them are loose, and if they are, tighten them up. Check your ownerā€™s manual about the correct torque to use on lug nuts, then use a torque wrench and the proper-sized socket to give them a twist.

Look for anything unusual. Sometimes, abnormal wear or damage on a tire can point to a system failure elsewhere. For example, earlier this year, we did a walk around and noticed a tire was wearing out oddly. It turned out a bushing in the suspension had gone bad, resulting in the unusual wear pattern on the tire. We shouldā€™ve been looking at our suspension springs and hangers more frequently, but because we were attuned to our tires and normal wear and tear, it alerted us to the fact that something was wrong. But finding that suspension issue earlier would have saved us the cost of replacing the tire.
Every 3-6 Months

Every 3-6 Months

Grease up your wet bolts. Our fifth wheel has wet bolts in the suspension and they need to be greased every couple of months. Greasing them regularly helps ensure your suspension keeps you going down the road smoothly. While youā€™re doing that maintenance anyway, check the nuts on the axle U-bolts and the wet bolts to make sure they are at the proper torque, too.Ā  Otherwise, an axle might move from its intended location, causing excessive tire wear or loss of control on the road.

Take a look at your hitch, too. Are all the pins and bolts in your hitch locked properly? Your hitch may also have some bolts that need to be torqued and areas that require grease. Give them a once over and consult your manual about regular hitch upkeep. And while many hitches come off the factory line using grease as a lubricant, lots of RVers install aftermarket lubrication pads that need to be regularly checked for wear and tear. When you inspect your hitch, make sure you look at all nuts, bolts, safety pins and hitch-related hardware.

Wipe down your leveling/stabilizing jacks and then test them. Before you operate your hydraulic jacks, wipe down the legs with a cloth to remove any debris that might get in the seals and cause leaks. Then ensure that the jacks are functioning properly by doing a test run leveling on an uneven surface.

Inspect your roof seams and seals. If leaks arenā€™t repaired immediately, they can lead to major issues like mold and mildew. So be proactive and inspect your seams and seals every 3-6 months. If any sealant is cracked, has any voids or is separating from the roof, repair or reseal it using the sealants recommended for use with your roof material.Ā 

As needed, check the propane lines for leaks. When you refill and reinstall the removable propane tanks, check the connections on the propane tank lines to make sure they donā€™t leak. You can do this with a soapy solution or a leak detector solution. Giving this system some attention when it comes time to swap out tanks is an easy way to prevent accidents.

Clean, test and maintain your slides. Before operating your slides, make sure the tops of the slides are clean. Then, when youā€™re operating your slides, take a look at the seals. A stick or a pine cone stuck in a seal, or a seal with a rip in it can cause water to leak in, so performing this check can prevent future water leaks.

Does the hydraulic reservoir have the correct amount of fluid in it? Checking this will ensure your slides extend and retract properly. In June, we noticed the level in our reservoir was less than it had been. With this as a starting point, we soon identified a slide hydraulic cylinder was leaking.Ā 

If you have a cable driven slide, are the cables in good condition? Or are they frayed? If they are frayed, get them replaced. If your slides are ā€œrack and pinion,ā€ make sure your gear packs are in good condition and not wearing abnormally.Ā 

There are other types of slide systems in addition to the ones I mentioned. If you have a slide system I left out, make sure youā€™re up to date on the manufacturerā€™s recommendations for maintenance around your modelā€™s slide systems.

Every 12 Months

Every 12 Months

If appropriate, winterize your RV. If you live in a climate that gets cold in the winter, youā€™ll want to take a few extra steps for storing your RV in the off-season. In addition to the roof and slide seal inspections Iā€™ve already mentioned, youā€™ll want to make sure to completely drain the water system and that you pour RV antifreeze in the sink and shower traps. This will help keep hardware and pipes from freezing and bursting or springing a leak. This is also a good time to flush your water heater and check the anode for wear, if applicable.

Repack the wheel bearings every 12 months or 12,000 miles. Our axle manufacturer recommends repacking the wheel bearings once a year or every 12,000 miles, whichever comes first. So if you travel a lot, youā€™ll need to do this more frequently. Skipping this check can lead to axle or brake failure. When we walked through this step this year, we realized it had been incorrectly performed for us last year, and we had been towing our rig with only three out of four brake assemblies working correctly. We were lucky we didnā€™t have an accident. But it was a good reminder that nothing can replace the knowledge you get from becoming familiar with all systems of your rig and doing your own inspections regularly.

With regular maintenanceā€“ā€“all the things listed above, and any other steps specific to your RVā€™s particular featuresā€“ā€“your RV and its systems should function well and last for many years. A well-maintained RV can provide you with the opportunity to make new memories each time you use it.

Tom and Beth Boswell travel in a 2019 Keystone Alpine.

Find Your Perfect RV

Whether you're new to the world of RVing or you're ready to narrow your search, we're here to help you sort through it all and find the RV that's right for you. Explore RVs based off of your lifestyle and the features important to you.

Find Your RV
An travel trailer RV parked in a green field.